Private Beta: Organizations are currently available to select enterprise customers. Contact our sales team to learn more.
Prerequisites
Organization Role
You must be an organization Owner or Admin
Enterprise Plan
Organizations are available to select enterprise customers
Open the Organization Dashboard
Owners and Admins can reach the Organization dashboard from the account menu at any time.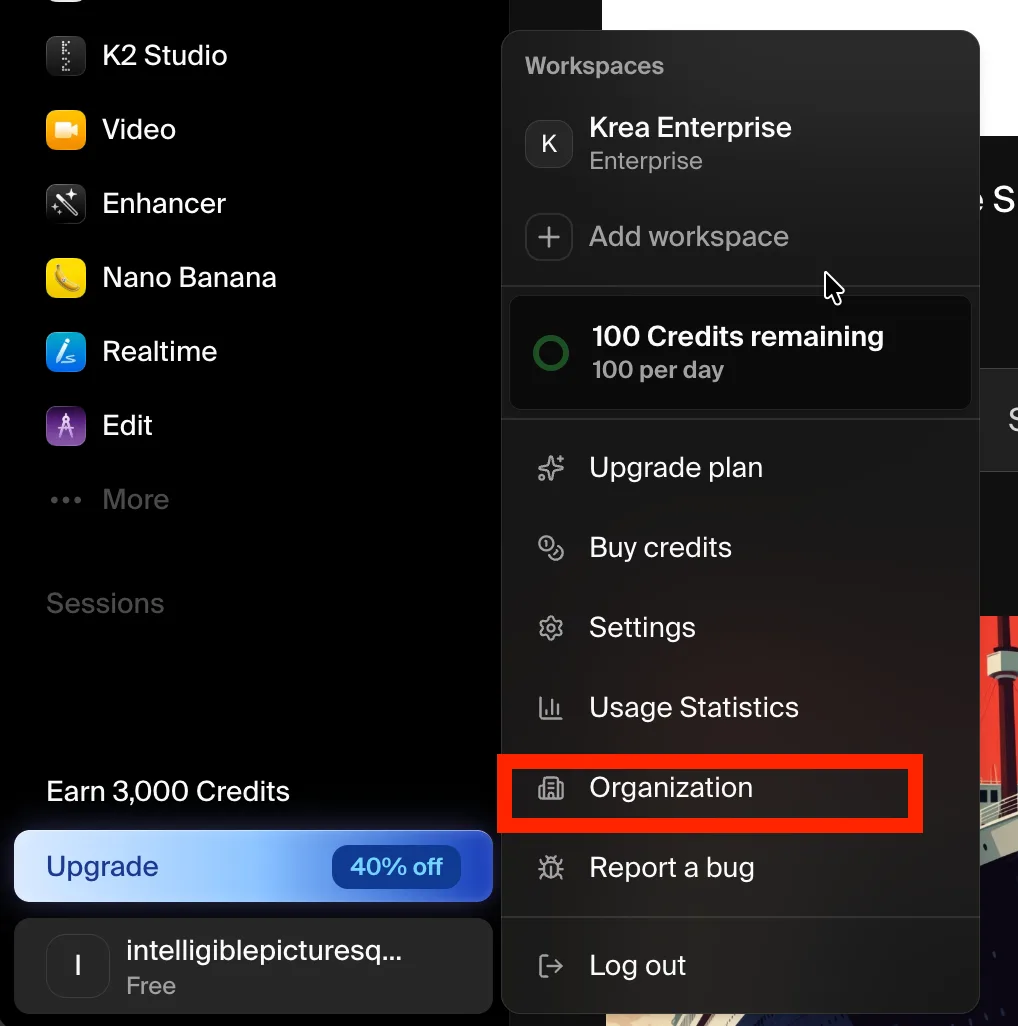
Dashboard Overview
The dashboard summarizes your organization at the top — its name, total members, and total workspaces — followed by three sections: Workspaces, Members, and Domains.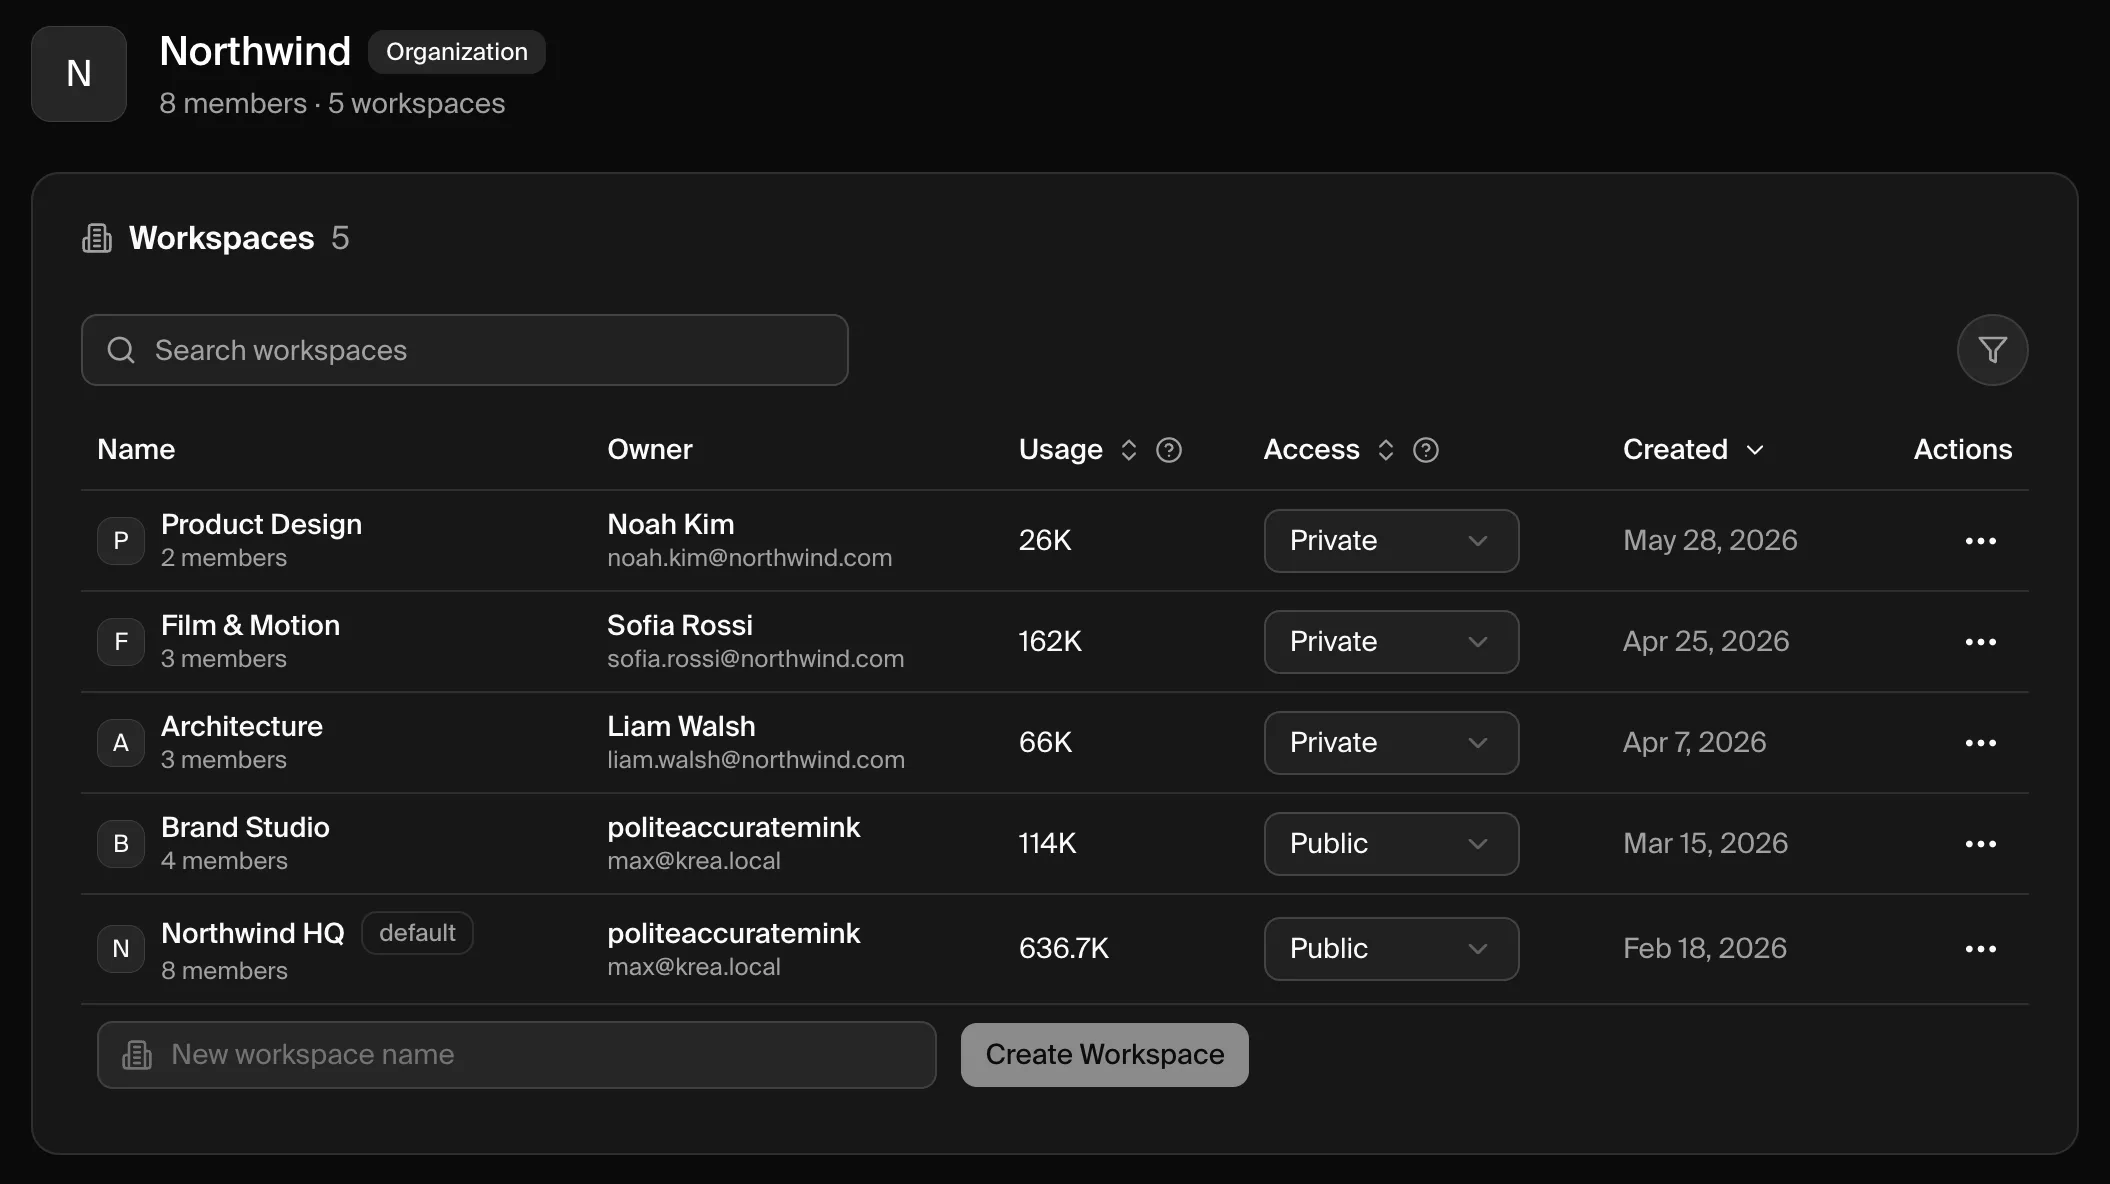
Workspaces
The Workspaces section lists every workspace in your organization.| Column | What it shows |
|---|---|
| Name | The workspace name. Your organization’s landing workspace is tagged default. |
| Owner | The workspace owner’s name and email. |
| Usage | Compute consumed by the workspace. |
| Access | Whether organization members can join the workspace — Public or Private. |
| Created | When the workspace was created. |
| Actions | The ⋯ menu, where you can manage the workspace’s members and review its usage. |
Create a Workspace
Enter a name
At the bottom of the Workspaces section, type a name into the New workspace name field.
Create it
Click Create Workspace. The new workspace is added to your organization and appears in the table.
Control Workspace Access
The Access dropdown controls how organization members can get into a workspace.| Access | Behavior |
|---|---|
| Private | Invite-only. Members can’t see or join the workspace unless they’re added to it. This is the default for new workspaces. |
| Public | Any organization member can discover and join the workspace from their join screen after signing in. |
Manage Workspace Members
Open the ⋯ menu on a workspace and choose Members to manage who belongs to it. From this panel you can:
- Review members and their workspace role.
- Change a role using the role dropdown next to each member (Owner, Admin, or Member).
- Remove a member with the delete icon.
- Invite people — enter one or more email addresses (separated by commas or spaces) and click Invite. Invited users join as Members.
Members
The Members section is the directory of everyone in your organization. It shows each person’s email, their organization role (Owner, Admin, or Member), and when they joined.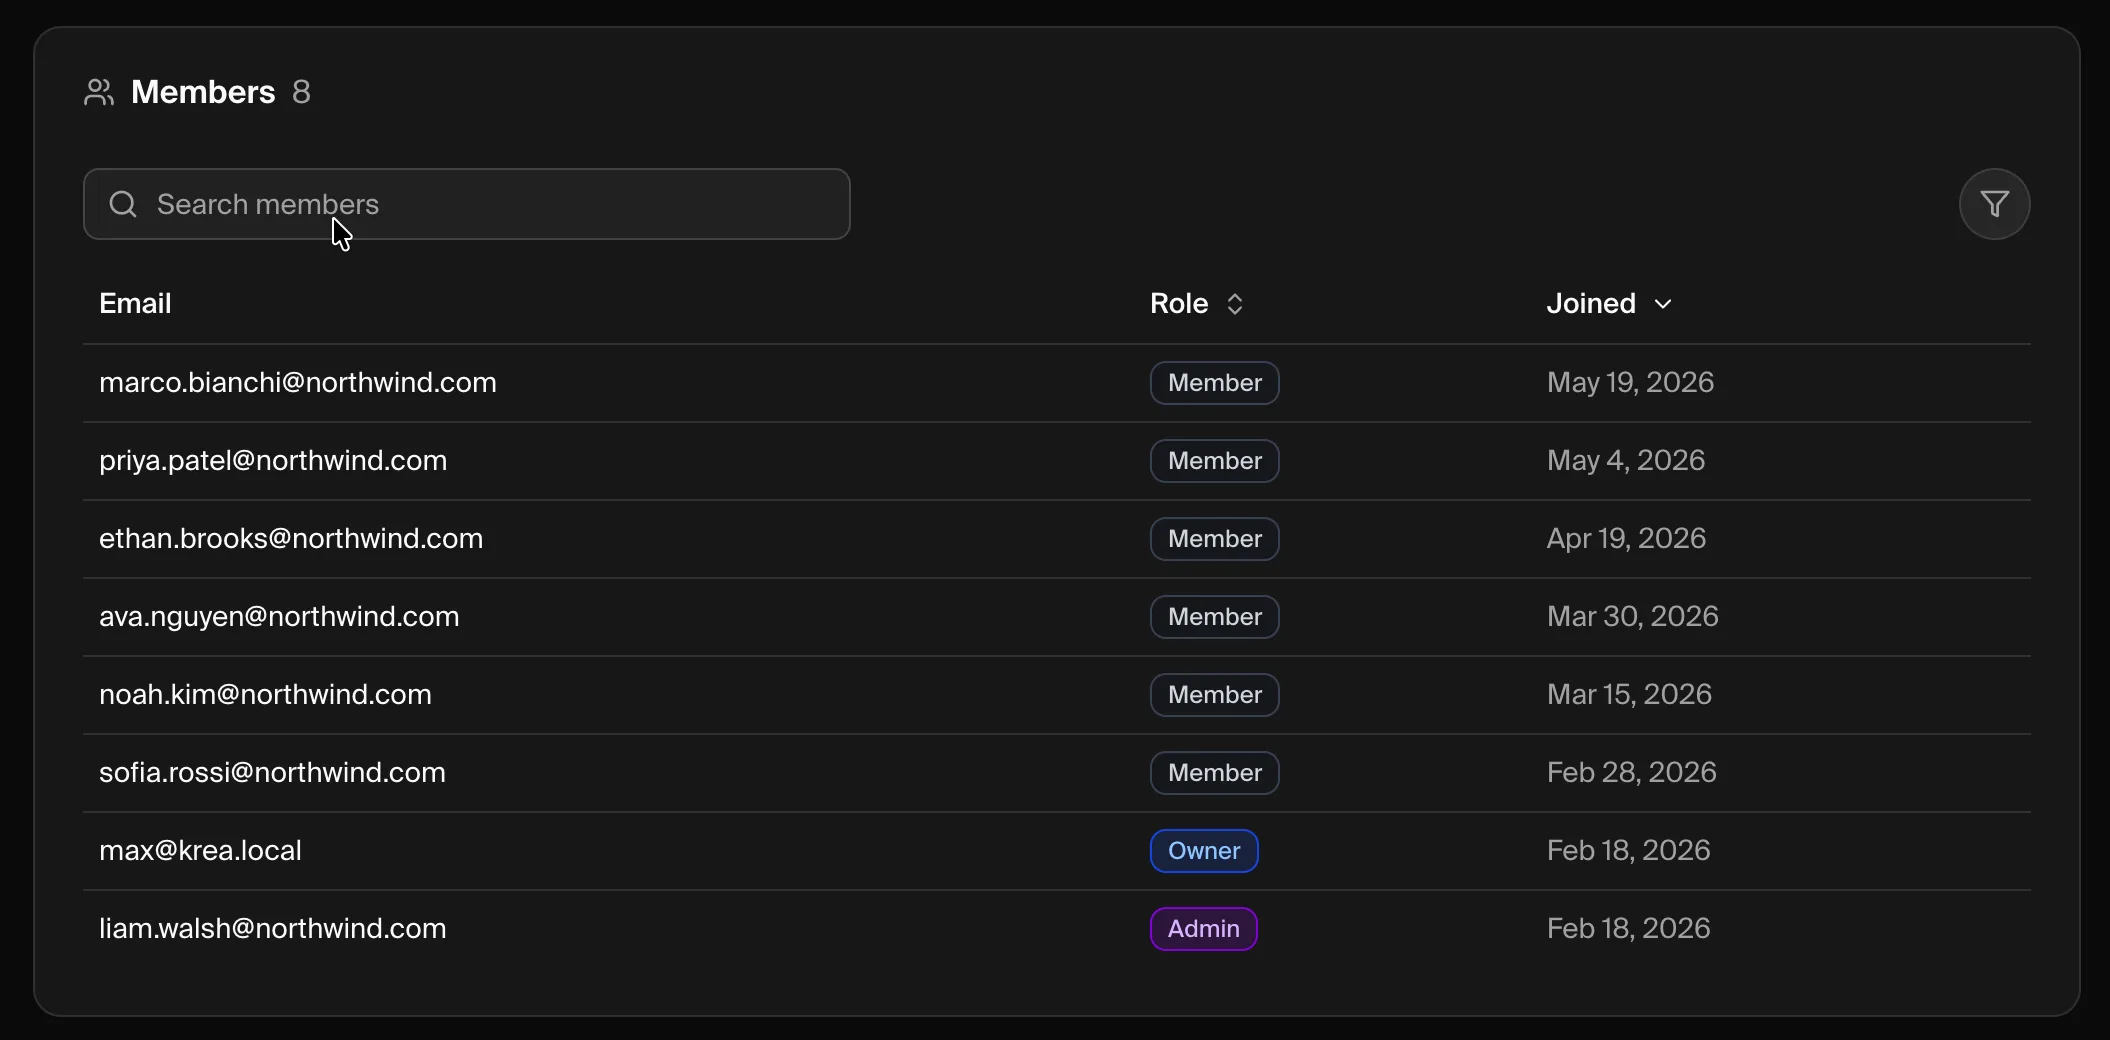 Search by email or role, and sort by role or join date. Most people join automatically through Domain Capture once your domain is verified.
Domains
The Domains section is where you verify the domains your organization owns and configure how people from those domains join and sign in.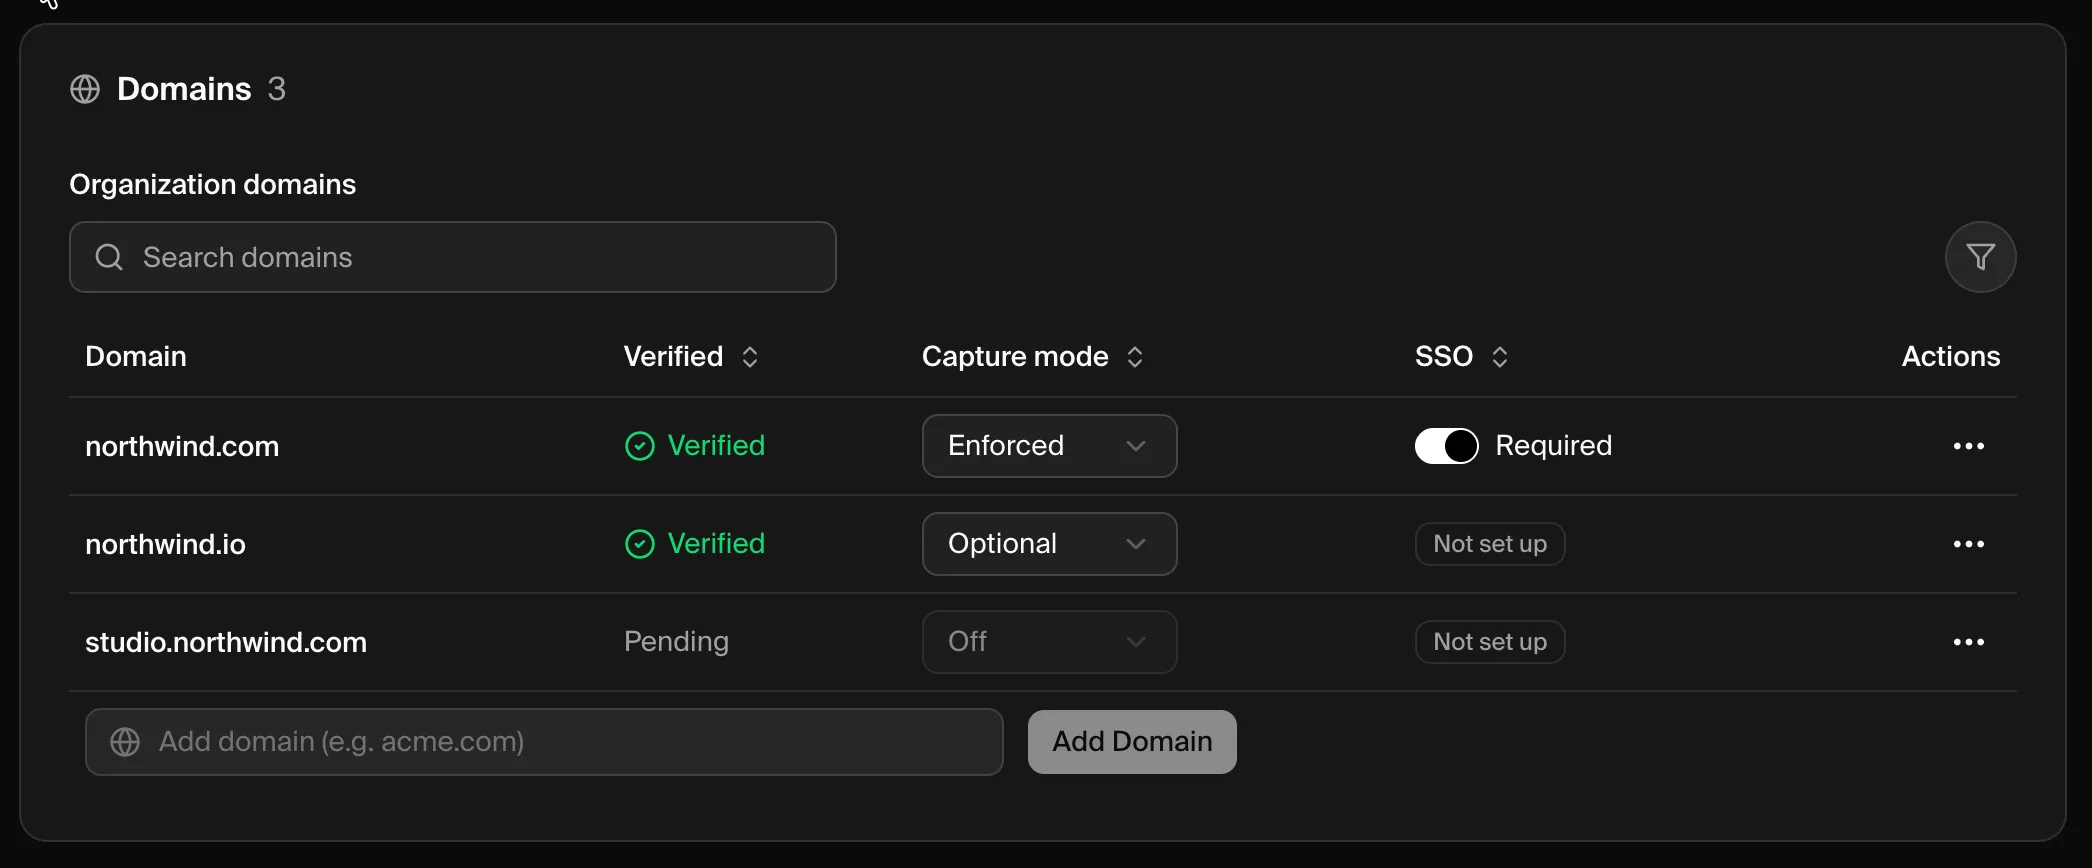 Each domain shows:
- Verified — whether the domain is Verified or still Pending a DNS check.
- Capture mode — what happens when someone with that email domain signs in: Off, Optional (they’re invited to join), or Enforced (they’re automatically enrolled).
- SSO — whether Single Sign-On is Required, Available, or Not set up for the domain.
Add and Verify a Domain
Add the domain
Enter your company’s email domain (for example,
acme.com) in the Add domain field and click Add Domain.Verify ownership
Open the ⋯ menu on the new domain and choose Verify domain, then add the DNS TXT record Krea provides. Full instructions are in Domain Verification & Capture.
Domain Verification & Capture
Verify domain ownership and choose how matching users are enrolled.
SAML SSO Setup
Connect your identity provider so your team signs in with SSO.
Troubleshooting
A member can't access a workspace
A member can't access a workspace
Organization membership doesn’t grant access to every workspace. Either set the workspace’s Access to Public so they can join it, or add them directly from the workspace’s Members panel.
A new teammate didn't get a workspace automatically
A new teammate didn't get a workspace automatically
Automatic enrollment depends on a verified domain with a Capture mode other than Off. Confirm the domain is Verified and review its capture mode in the Domains section.
A domain is stuck on Pending
A domain is stuck on Pending
DNS changes can take time to propagate. Double-check the TXT record matches exactly and try again — see the Domain Verification troubleshooting steps.
I can't find the Organization dashboard
I can't find the Organization dashboard
The dashboard is only available to organization Owners and Admins. If your role is correct and you still can’t open it, contact support@krea.ai.
Need Help?
Enterprise Support
Contact our enterprise support team at support@krea.ai
Sales Team
Questions about enterprise plans? Email sales@krea.ai